How to Customize Your Own Oversized Sweatshirt or Hoodie With Alterations. |
|||
|---|---|---|---|
|
|
|||
Introduction:How to Customize Your Own Oversized Sweatshirt or Hoodie With Alterations. Oversized sweatshirts and hoodies have become a staple in modern fashion, offering comfort and a relaxed, effortless style. However, sometimes we want to add a personal touch to these cozy garments and make them truly unique. One way to achieve this is by customizing your own oversized sweatshirt or hoodie through alterations. In this blog post, we will explore various creative alterations that can transform a plain, oversized garment into a one-of-a-kind fashion statement. When it comes to personalizing your oversized sweatshirt or hoodie, the possibilities are endless. Customizations allow you to express your individuality, showcase your creativity, and make a bold fashion statement. Whether you’re an experienced DIY enthusiast or just starting to explore the world of alterations, this guide will provide you with ideas and inspiration to customize your oversized sweatshirt or hoodie. By adding alterations to your oversized garment, you can go beyond the conventional boundaries of fashion and create something that truly reflects your style and personality. From simple modifications like cropping and rolling up sleeves to more intricate techniques like embroidery, stenciling, and distressing, you can tailor your sweatshirt or hoodie to match your unique vision. Customized sweatshirts and hoodies also make excellent gifts for friends and loved ones. By infusing your personal touch into the garment, you create a thoughtful and meaningful present that will be cherished. We will delve into specific alterations you can explore to transform your oversized sweatshirt or hoodie. From cropping and sleeve transformations to embroidery, stenciling, and beyond, we will guide you through the steps necessary to create your own customized masterpiece. So, get ready to unleash your creativity and let’s dive into the exciting world of DIY alterations for oversized sweatshirts and hoodies!
|
|||
 |
|||
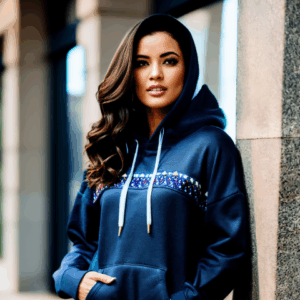
Choose the Right Sweatshirt or Hoodie:Before you embark on your customization journey, it’s important to select the right sweatshirt or hoodie as your canvas. Here are a few key considerations to keep in mind: Fit and Size: Look for an oversized sweatshirt or hoodie that fits you well in terms of length and width. While the garment should be larger than your usual size, ensure that it still maintains a balanced and flattering silhouette. Pay attention to the shoulder seams, arm length, and overall proportions to ensure a comfortable and stylish fit. Fabric Quality: Opt for a sweatshirt or hoodie made from high-quality fabric. Look for materials like cotton, fleece, or a blend of fabrics that offer both comfort and durability. Avoid fabrics that easily stretch out or lose their shape, as they may not hold up well during alterations. Color and Versatility: Consider the color of the sweatshirt or hoodie and how it aligns with your personal style and the customization ideas you have in mind. Neutral colors like black, gray, or white are versatile and provide a great base for various alterations. However, don’t be afraid to experiment with bolder colors if they resonate with your vision. Fabric Composition: Check the fabric composition to ensure it is suitable for the alterations you plan to make. For example, if you want to apply fabric paint, ensure that the fabric is compatible and won’t bleed or distort the design. Similarly, certain alterations like distressing or ripping may work better with sturdier fabrics. Accessibility: Assess the sweatshirt or hoodie for accessibility in terms of seams, pockets, and closures. These elements can affect the ease of alteration and the overall outcome of your customization. Consider how they may influence the placement of designs, embroidery, or other alterations you have in mind. By selecting the right sweatshirt or hoodie as your starting point, you set the foundation for a successful customization project. A well-fitting, high-quality garment will ensure that your alterations have a solid base to work with, enhancing the overall aesthetics and longevity of your creation. Once you have chosen the perfect sweatshirt or hoodie, it’s time to gather the necessary tools and delve into the exciting world of alterations. In the following sections, we will explore various creative customization techniques to help you transform your oversized garment into a personalized fashion statement. |
|||
 |
|||
| Ella’s Alterations LLC 813-445-8894 https://ellasalterations.com | |||
Gather Your Tools:Before you embark on customizing your oversized sweatshirt or hoodie, it’s important to gather the necessary tools. Having the right equipment on hand will make the alteration process smoother and more enjoyable. Here are some essential tools you’ll need: Fabric Scissors: Invest in a pair of sharp fabric scissors specifically designed for cutting through various types of fabrics. These scissors should be dedicated solely to fabric to maintain their sharpness. Sewing Needles: Make sure you have a variety of sewing needles available. Different needle sizes and types are suitable for different fabric weights and techniques. For example, a sharp needle is ideal for woven fabrics, while a ballpoint needle is better suited for knits. Sewing Thread: Stock up on sewing thread in a range of colors. Choose high-quality thread that matches or complements the color of your sweatshirt or hoodie. It’s always handy to have basic colors like black, white, and gray, as well as some bold or contrasting colors for decorative stitching. Pins: Use straight pins or safety pins to hold fabric pieces together during the alteration process. They are helpful for pinning patterns, securing trims, or temporarily holding hems in place. Fabric Markers or Chalk: These tools are essential for marking measurements, patterns, or designs on your sweatshirt or hoodie. Choose markers or chalk that are specifically designed to wash out or disappear when the garment is laundered. Fabric Glue: Fabric glue can be a convenient alternative to sewing in certain situations. It is useful for attaching patches, trims, or appliqués. Ensure that the fabric glue you choose is suitable for the specific fabric of your garment. Embellishments: Get creative with your customizations by gathering various embellishments such as patches, beads, sequins, buttons, or ribbons. These items can add texture, color, and personality to your sweatshirt or hoodie. Optional Tools: Depending on the alterations you plan to make, you may need additional tools such as an embroidery hoop, embroidery floss, fabric paint, stencils, or distressing tools like sandpaper or a razor blade. Consider your customization ideas and gather the necessary tools accordingly. Having these tools readily available will ensure that you can tackle any alterations you desire. Keep them organized in a dedicated sewing kit or toolbox, making it easy to access them whenever inspiration strikes. Now that you have your tools prepared, you’re ready to dive into the exciting process of customizing your oversized sweatshirt or hoodie. In the following sections, we will explore a variety of creative alterations that will help you transform your garment into a unique fashion statement. |
|||
 |
|||
| Personalize Your Wardrobe: Why Customized Clothing is a Must-Have. | |||
| Ella’s Alterations LLC 813-445-8894 https://ellasalterations.com | |||
Crop It:One of the simplest and most effective alterations you can make to an oversized sweatshirt or hoodie is cropping it to a desired length. Cropping not only gives the garment a trendy and modern look but also allows you to showcase your personal style. Here’s how to crop your sweatshirt or hoodie: Measure and Mark: Put on the sweatshirt or hoodie and determine the desired length you want to crop it to. Use a measuring tape to measure from the bottom hem to the desired length. Mark this length using fabric markers or chalk. Prepare for Cutting: Take off the sweatshirt or hoodie and lay it flat on a clean, flat surface. Smooth out any wrinkles or folds to ensure accuracy during the cutting process. Cut Carefully: Using sharp fabric scissors, carefully cut along the marked line. Take your time and make straight and even cuts. If you prefer a raw or frayed edge, you can leave it as is. However, if you want a more finished look, proceed to the next step. Hem the Edge (Optional): To prevent fraying and give a clean finish to the cropped edge, you can hem it. Fold the edge inward by about half an inch and secure it with pins. Using a sewing needle and thread that matches the color of your garment, stitch along the folded edge with a straight or zigzag stitch. This will create a neat and secure hem. Final Touches: After cropping and hemming, try on your newly cropped sweatshirt or hoodie to ensure the length is as desired. Make any adjustments if needed. Cropping your oversized sweatshirt or hoodie can instantly transform its silhouette and give it a stylish, more fitted look. The cropped length works well with high-waisted jeans, skirts, or shorts, creating a flattering and balanced ensemble. Additionally, you can further customize your cropped garment by adding embellishments, such as patches or embroidery, to the newly exposed area. Remember, cropping is a permanent alteration, so make sure you’re confident in the desired length before cutting. Take your time, follow the steps carefully, and enjoy the process of personalizing your oversized sweatshirt or hoodie to suit your individual style. |
|||
 |
|||
Sleeve Transformations:The sleeves of an oversized sweatshirt or hoodie provide an excellent opportunity for customization and adding unique details to your garment. Here are some creative sleeve transformations to consider: Rolled-Up Sleeves: One of the simplest ways to transform the sleeves is by rolling them up. This casual and effortless style adds a relaxed vibe to your sweatshirt or hoodie. Roll the sleeves up to your desired length and secure them with a few small stitches. You can use matching or contrasting thread to add a touch of visual interest. Patterned or Embellished Cuffs: Take your rolled-up sleeves a step further by adding patterns or embellishments to the cuffs. You can attach fabric patches, lace trims, or decorative ribbons to the inner or outer edge of the cuffs. Secure them with stitches or fabric glue for a personalized touch. Bell Sleeves: Create a dramatic and fashionable look by transforming the sleeves into bell sleeves. Measure the desired length for the bell shape and mark it on the sleeves. Starting from the underarm seam, gradually widen the sleeve by cutting a curved line towards the marking. The wider the curve, the more pronounced the bell shape. Finish the raw edge with a rolled hem or a serger stitch. Lace Inserts: Add a touch of femininity and elegance to your sweatshirt or hoodie by incorporating lace inserts on the sleeves. Cut out strips of lace fabric and sew them onto the sleeves, either vertically or horizontally. You can sew them along the entire length of the sleeve or create specific patterns. Ensure the lace aligns with the desired length and shape of the sleeves. Contrasting Fabric Patches: Make a bold statement by adding contrasting fabric patches to the sleeves. Cut out fabric pieces in different shapes and sizes, ensuring they complement the color scheme and overall aesthetic of your sweatshirt or hoodie. Sew the patches onto the sleeves, creating a unique and eye-catching design. Remember to experiment with different combinations and techniques to find the sleeve transformation that resonates with your personal style. You can mix and match these ideas or even combine them with other alterations to create a truly customized and standout garment. Once you have transformed the sleeves, step back and admire your handiwork. The unique sleeve details will add personality and flair to your oversized sweatshirt or hoodie, making it a true reflection of your individual style.
|
|||
 |
|||
|
|||
| Customize Your Pageant Look: Altered Dresses for a Flawless Appearance! | |||
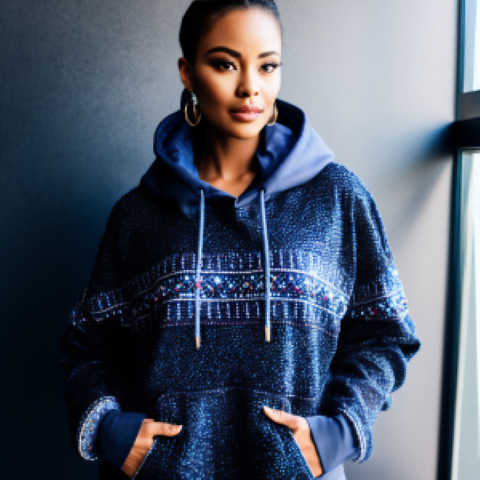
Embroidery and Appliqué:Embroidery and appliqué are excellent techniques for adding intricate designs, patterns, and textures to your oversized sweatshirt or hoodie. These decorative elements can elevate your garment, giving it a personalized and artistic touch. Here’s how you can incorporate embroidery and appliqué into your customization process: Embroidery: a. Choose a Design: Select a design or pattern that resonates with your style and complements the overall aesthetic of your sweatshirt or hoodie. You can find pre-made embroidery patterns online, create your own design, or draw inspiration from nature, geometric shapes, or typography. Appliqué: a. Choose Fabric and Design: Select a fabric that complements your sweatshirt or hoodie and choose a design or shape to appliqué onto the fabric. You can use fabric scraps, patterned fabric, or even repurpose old clothing to create unique appliqué pieces. Embroidery and appliqué offer endless opportunities for customization and self-expression. You can embroider intricate patterns, floral motifs, or even personal messages onto your sweatshirt or hoodie. Appliqué allows you to add fabric patches, shapes, or even lettering for a bold and artistic statement. These techniques require patience and attention to detail but the end result is a truly unique and personalized garment that showcases your creativity. Let your imagination run wild and experiment with different colors, stitches, and designs to create a customized sweatshirt or hoodie that is a wearable work of art. |
|||
| Ella’s Alterations LLC 813-445-8894 https://ellasalterations.com | |||
 |
|||
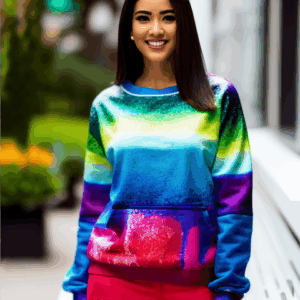
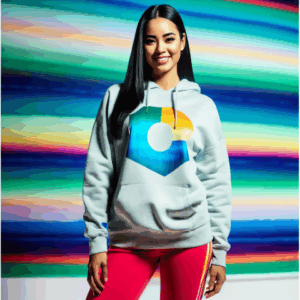
Stenciling and Fabric Paint:If you’re looking to add vibrant colors, bold patterns, or unique graphics to your oversized sweatshirt or hoodie, stenciling and fabric paint are fantastic techniques to explore. They allow you to unleash your creativity and create eye-catching designs. Here’s how you can incorporate stenciling and fabric paint into your customization process: Prepare the Stencil: Choose a stencil design that suits your style and complements the overall aesthetic of your garment. You can find ready-made stencils or create your own by drawing a design on stencil material or thick paper and cutting it out carefully using a craft knife or scissors. Position the Stencil: Lay your sweatshirt or hoodie flat on a protected surface, ensuring it is smooth and wrinkle-free. Position the stencil on the desired area of the garment and secure it in place with tape or adhesive spray to prevent any movement during painting. Apply the Fabric Paint: Pour fabric paint onto a palette or plate and load a stencil brush or sponge with paint. Dab the brush or sponge gently over the stencil openings, making sure not to apply too much paint at once. Start with light layers and gradually build up the color to achieve the desired intensity. Take care to stay within the stencil boundaries to maintain clean and crisp lines. Remove the Stencil: Once you’ve finished applying the paint, carefully lift the stencil off the garment while ensuring not to smudge the paint. If you’re using multiple stencils or repeating the design, allow the first layer to dry before repositioning the stencil for the next application. Set the Paint: Follow the instructions provided by the fabric paint manufacturer to set the paint. This may involve heat-setting the painted area with an iron or placing the garment in a dryer. Properly setting the paint will ensure its longevity and resistance to washing and fading. Stenciling and fabric paint offer limitless possibilities for customization. You can create vibrant geometric patterns, bold typography, nature-inspired motifs, or even intricate illustrations. Experiment with different colors, techniques, and layering to achieve the desired effect. Additionally, you can combine stenciling with other customization techniques, such as embroidery or appliqué, to create a multi-dimensional and visually striking design. Let your creativity run wild and have fun exploring the possibilities that stenciling and fabric paint offer. |
|||
 |
|||
Distressing and Ripping:If you’re aiming for a trendy, worn-in, and vintage-inspired look for your oversized sweatshirt or hoodie, distressing and ripping techniques are perfect for achieving that effortlessly cool vibe. These techniques give your garment a lived-in appearance and add a touch of edginess. Here’s how you can distress and rip your sweatshirt or hoodie: Choose the Areas to Distress: Decide which areas of your garment you want to distress. Common areas include the neckline, hemline, cuffs, and pockets. You can also distress specific parts of the fabric, such as the sleeves or front/back panels, to create a unique look. Tools for Distressing: Gather tools such as sandpaper, a pumice stone, a razor blade, or a cheese grater. These items will help create various textures and distressing effects on the fabric. Start Distressing: Depending on the desired effect, you can use different techniques. For a faded and worn look, gently rub sandpaper or a pumice stone over the fabric in circular motions. Focus on areas that would naturally experience more wear, such as the elbows or edges. If you want to create small holes or frayed edges, carefully use a razor blade or cheese grater to scrape the fabric. Take your time and distress the fabric gradually, ensuring you achieve the desired level of distressing without going too far. Ripping Techniques: To create intentional rips and tears, use a pair of sharp fabric scissors or a razor blade. Make small horizontal cuts along the areas you want to distress, such as the cuffs or hemline. Once the initial cuts are made, gently pull on the fabric to encourage natural fraying. For larger rips, make a vertical cut and then rip the fabric apart by hand for an organic and authentic look. Remember to distress both sides of the fabric if you want a distressed effect from both the inside and outside. Finishing Touches: After distressing and ripping, wash and dry your sweatshirt or hoodie to further enhance the distressed appearance. This will help soften the fabric and blend the distressed areas with the rest of the garment. Optionally, you can stitch around the edges of the rips or distressing to prevent further fraying, or leave them as is for a more rugged look. Distressing and ripping techniques give your oversized sweatshirt or hoodie a unique and individualized character. Each garment will have its own distinct distressed pattern, making it truly one-of-a-kind. Pair your distressed and ripped sweatshirt or hoodie with jeans, leggings, or a skirt to create a stylish and effortlessly cool ensemble. Remember to approach distressing and ripping with caution, as it is a permanent alteration. Start with small distressing techniques and gradually increase the level of distressing if desired. The goal is to achieve a worn-in and vintage look without compromising the structural integrity of the garment. |
|||
 |
|||
Experiment with Layers:One of the key aspects of personalizing your oversized sweatshirt or hoodie is to have fun and experiment with layers. Layering not only adds depth and visual interest to your outfit but also allows you to showcase different elements of your customization. Here are some ideas to inspire your layering creativity: Collared Shirt Underneath: For a preppy and polished look, layer a collared shirt underneath your sweatshirt or hoodie. Choose a shirt in a contrasting color or pattern to add a pop of visual interest. Leave the collar and cuffs peeking out from the neckline and sleeves for a stylish and sophisticated touch. Longline Cardigan or Jacket: Add an extra layer of warmth and style by pairing your oversized sweatshirt or hoodie with a longline cardigan or jacket. Opt for a cardigan in a complementary color or a statement jacket to elevate the overall look. This layering technique allows you to play with proportions and create a fashionable ensemble. Denim or Leather Jacket: For an edgy and casual vibe, layer your sweatshirt or hoodie with a denim or leather jacket. The combination of textures and styles adds a touch of rebelliousness and streetwear flair. Play with different lengths and washes of denim or experiment with various leather jacket styles to find the perfect pairing. Button-Up Flannel: Embrace a cozy and laid-back aesthetic by layering your sweatshirt or hoodie with a button-up flannel shirt. The flannel’s plaid pattern and soft fabric create a comfortable and relaxed vibe. Tie the flannel around your waist or leave it unbuttoned for a grunge-inspired look. Oversized Scarf: In colder months, accessorize your sweatshirt or hoodie with an oversized scarf. Choose a scarf in a contrasting color or pattern to add visual interest and warmth. Drape it casually around your neck or knot it loosely for a cozy and stylish look. Statement Accessories: Complete your layered look by incorporating statement accessories. Add a chunky necklace, a wide-brimmed hat, or a patterned bandana to enhance the overall style and make a bold fashion statement. Remember, layering allows you to mix and match different pieces to create a customized and unique outfit. Play with textures, colors, and patterns to express your personal style and create a cohesive look. |
|||
 |
|||
Conclusion:Customizing your own oversized sweatshirt or hoodie with alterations is a fantastic way to express your creativity, add a personal touch to your wardrobe, and create unique and stylish garments. Throughout this blog post, we’ve explored various techniques and ideas for customizing your sweatshirt or hoodie, including cropping, sleeve transformations, embroidery, appliqué, stenciling, fabric paint, distressing, and layering. By choosing the right sweatshirt or hoodie, gathering the necessary tools, and following the step-by-step instructions for each customization technique, you can transform a plain garment into a fashion statement that reflects your individual style and personality. Remember, the key to successful customization is experimentation and embracing your own creativity. Feel free to mix and match techniques, combine different ideas, and add your own personal flair to make the garment truly unique. As you embark on the customization journey, take your time, enjoy the process, and don’t be afraid to make mistakes. Some of the best creations come from unexpected twists and turns along the way. Once you’ve completed your customizations, step back and admire your work. You now have a one-of-a-kind oversized sweatshirt or hoodie that showcases your creativity and reflects your personal style. Wear it with confidence and pride, knowing that you’ve created something truly special. So, grab your scissors, sewing kit, fabric paint, and imagination, and let your creativity soar as you transform your oversized sweatshirt or hoodie into a wearable piece of art. Get ready to turn heads and inspire others with your unique and customized garment. How to Customize Your Own Oversized Sweatshirt or Hoodie With Alterations. #CustomizeYourStyle #DIYFashion #PersonalizedSweatshirt #HoodieAlterations #CreativeExpressions #FashionDIY #CustomizationIdeas #UniqueStyle #HandmadeFashion #CustomizeWithLove #ExpressYourself #FashionCreativity #SweatshirtMakeover #HoodieCustomization #CustomFashionTrends #LayeringInspiration #FashionDIYProjects #WearableArt #StyleWithPersonality #CustomClothing #EllasAlterationsLLCt. |
|||
 |
|||
|
|||
| Ella’s Alterations LLC 813-445-8894 https://ellasalterations.com | |||
| Step into the Limelight: Customized Clothing for Unparalleled Style. | |||
|


1 Comment
Great tips on styling sweatshirts! At Zestwear, we believe sweatshirts for men are all about comfort and style. For a relaxed yet chic look, pair an hoodie with fitted jeans or joggers. Don’t forget to add sneakers or boots to complete the outfit. You can even layer it with a jacket for a more stylish edge. The beauty of sweatshirts is how versatile they are—whether you’re keeping it casual or going for a streetwear vibe, they’ve got you covered! Check out our latest collection for more trendy sweatshirts for men that make styling effortless!
https://zestwear.in/